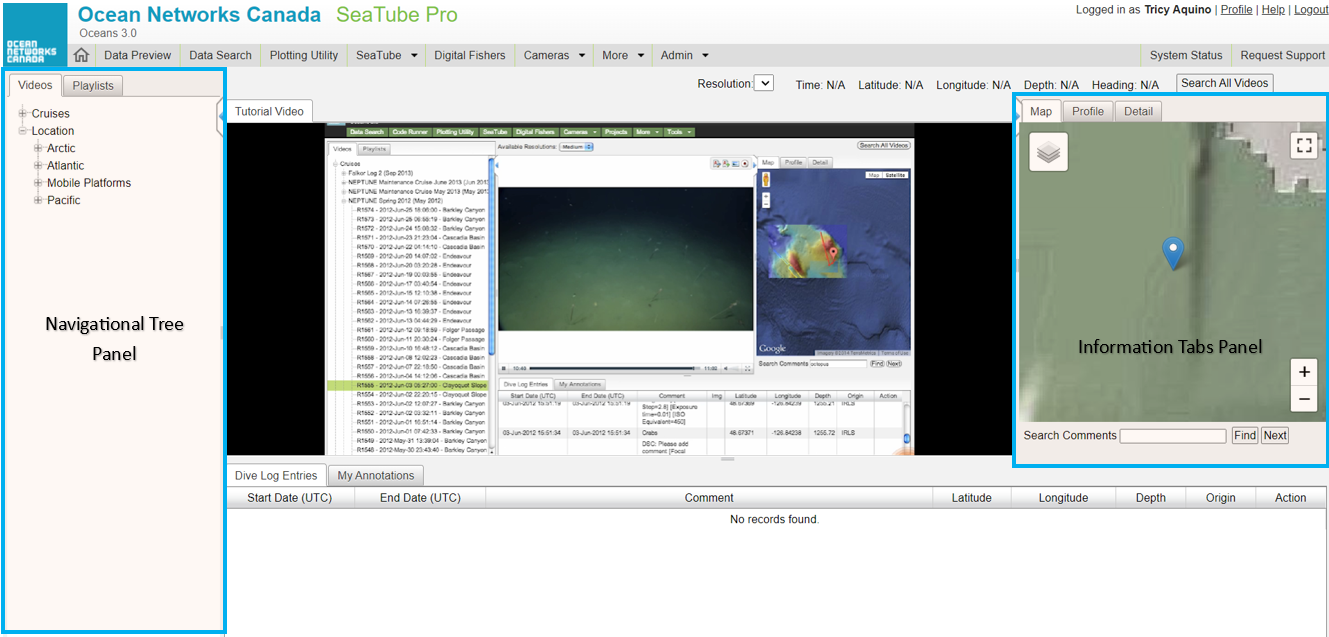
What is SeaTube Pro?
Fixed Location Cameras (SeaTube Pro) lets you watch, search, and annotate on videos from observatory cameras both above and below water, as well as Remotely-Operated Vehicles (ROV's).
How to Use SeaTube Pro and its Features
The SeaTube Pro application allows you to play a video, annotate it, and/or save your favorite clips from the available cruises and fixed observatory cameras. In its landing page, you will see two collapsible panels and a main panel that shows the video, dive log entries, and your annotations.
You can maximize your view by collapsing the two panes on each side of the screen.
The camera types used for the recording are shown on top of the video screen as the title of the tabs. Digital Still Cameras tab provides still images from the video.
On the right top, you will also see the available features you can do in SeaTube Pro.
A box with nine still-frame images will appear once you click the Snapshot button. To enlarge one of these images, click on it and/or right-click the image to save it to your computer.
Making Playlists
SeaTube allows you to create playlists from clips you find in the video archives.
Creating Playlists
- To start a playlist, find a clip of interest, cue to the start of the section you want to capture, then click the Start Recording button.
- When you reach the end of your section of interest, click the same button to stop recording.
- A window pops up, letting you add the selection to a new or existing playlist.
- Enter a name and click Save.
Adding Clips to a Playlist
You can select additional clip segments and add them to the playlist.
Replaying Playlists
After creating a playlist, you can view and replay it by clicking its name under the Playlists tab.
There are two ways to do a search in SeaTube Pro:
- Search All Videos button - this is located on top of the Information Tabs and it allows you to do a search on all videos available based on the comments.
- Search Comments - this allows you to search on the comments of the video you are playing.


